For this tutorial you will need 1 yd of knit fabric, matching thread and a sewing machine. If you do not have a sewing machine, this tutorial is not for you either.
I'd also like to note, that I used a rotary cutter rather than scissors. This is totally the way to go. If you do not have a rotary cutter, then you should purchase one. And just so you know, if you are cutting with it on your bed, and you roll off the mat that you are cutting on, it will continue to cut the fabric, only it will be your bedspread. Just a heads up on that.
Step 1
Prewash your fabric. Why? Because you don't want it to shrink after you do all that sewing. Trust me.
Step 2
Get a pair or leggings or pants that fit your child really well. Turn them inside out. Get your prewashed fabric and fold over the edge until there is room to lay out the pants right up against the edge of the fabric. You are going to cut around the pants following the shape and adding some room around it for the seam allowance. The seam allowance is the space you need to allow for the seam. Is that helpful information? You could trace it out if you want, or just eyeball it as I do. This is where a rotary cutter is a useful tool.
This is where I set my presser foot when I stitched these. You can do it as close to the edge as you like. Just be consistent with each one. Do not back stitch when you start or finish and leave extra thread on each end. Return your settings back to their normal settings before you get up and go back to your pants. Otherwise, you will forget and will make ruffles out of your the pant legs, which you don't want to do.
When you are finished you will have a ruffle. Note the thread ends I have on each end of my ruffle. You need this extra space to stretch out your ruffle as needed to fit across your pant leg. Gently slide the fabric along the thread to adjust it to fit, to not pull too hard or you will snap the thread.
You probably have excess ruffle on the sides of your pants, so just line up your stitch to where it needs to be for the leg.
Fold down the top of the pants. You could pin, I did not. You could measure it out, I did not. It's really not going to matter, it will not show anyways.
Then stitch around the top of the pants allowing plenty of space for the elastic to run through. Do not sew all the way around, stop and leave a gap where you will insert the elastic and work it around the casing you just made.
To insert the elastic, put a safety pin on one end and work it through. Once you come full circle, overlap the ends of the elastic and stitch back and forth several times, make sure it's all tucked in and close up your gap by stitching that small opening shut.
When you lay out your pants, make sure to lay them completely flat and pull out the crotch area really well so that you are sure to get that shape when you cut. Also, make sure you lay them out exactly as I have them with the straight side on the fold.
You will need to cut out two identical pieces.
This is what it will look like when you are done cutting.
Step 3
Open the two pieces and lay them flat one on top of the other. If you are using fabric that has a right side and a wrong side, lay the two pieces right side together. Pin together from the top to the crotch to hold it while you sew. You are going to do a simple straight stitch from the top pin down to the crotch.
To clarify, if you were sewing my fabric, you would sew from the top pin down to the bottom pin. Do this on each side.
{At this point in my tutorial, I discovered my sweet daughter was using a glue stick to hang pretty pictures on her door. Stop what you are doing and remove the glue stick. Then continue. }
Step 4
Now open the pants so that the seams you just made are now in the center. And suddenly it will all make sense! Now you are getting excited, aren't you?
Step 5
Cut out your ruffles. Another instance where a rotary cutter is much easier than scissors. I cut out 6 strips of fabric, they were probably 25 inches long and 3 inches wide. The good news is, that if your lines aren't perfectly straight, no one will know. So, I didn't measure things out, I just eyeballed it. You can make these any size you would like. Once I actually attached the ruffles, I ended up using only two per leg because it felt like plenty, so you might want to go down to two inches if you want three layers.
Step 5
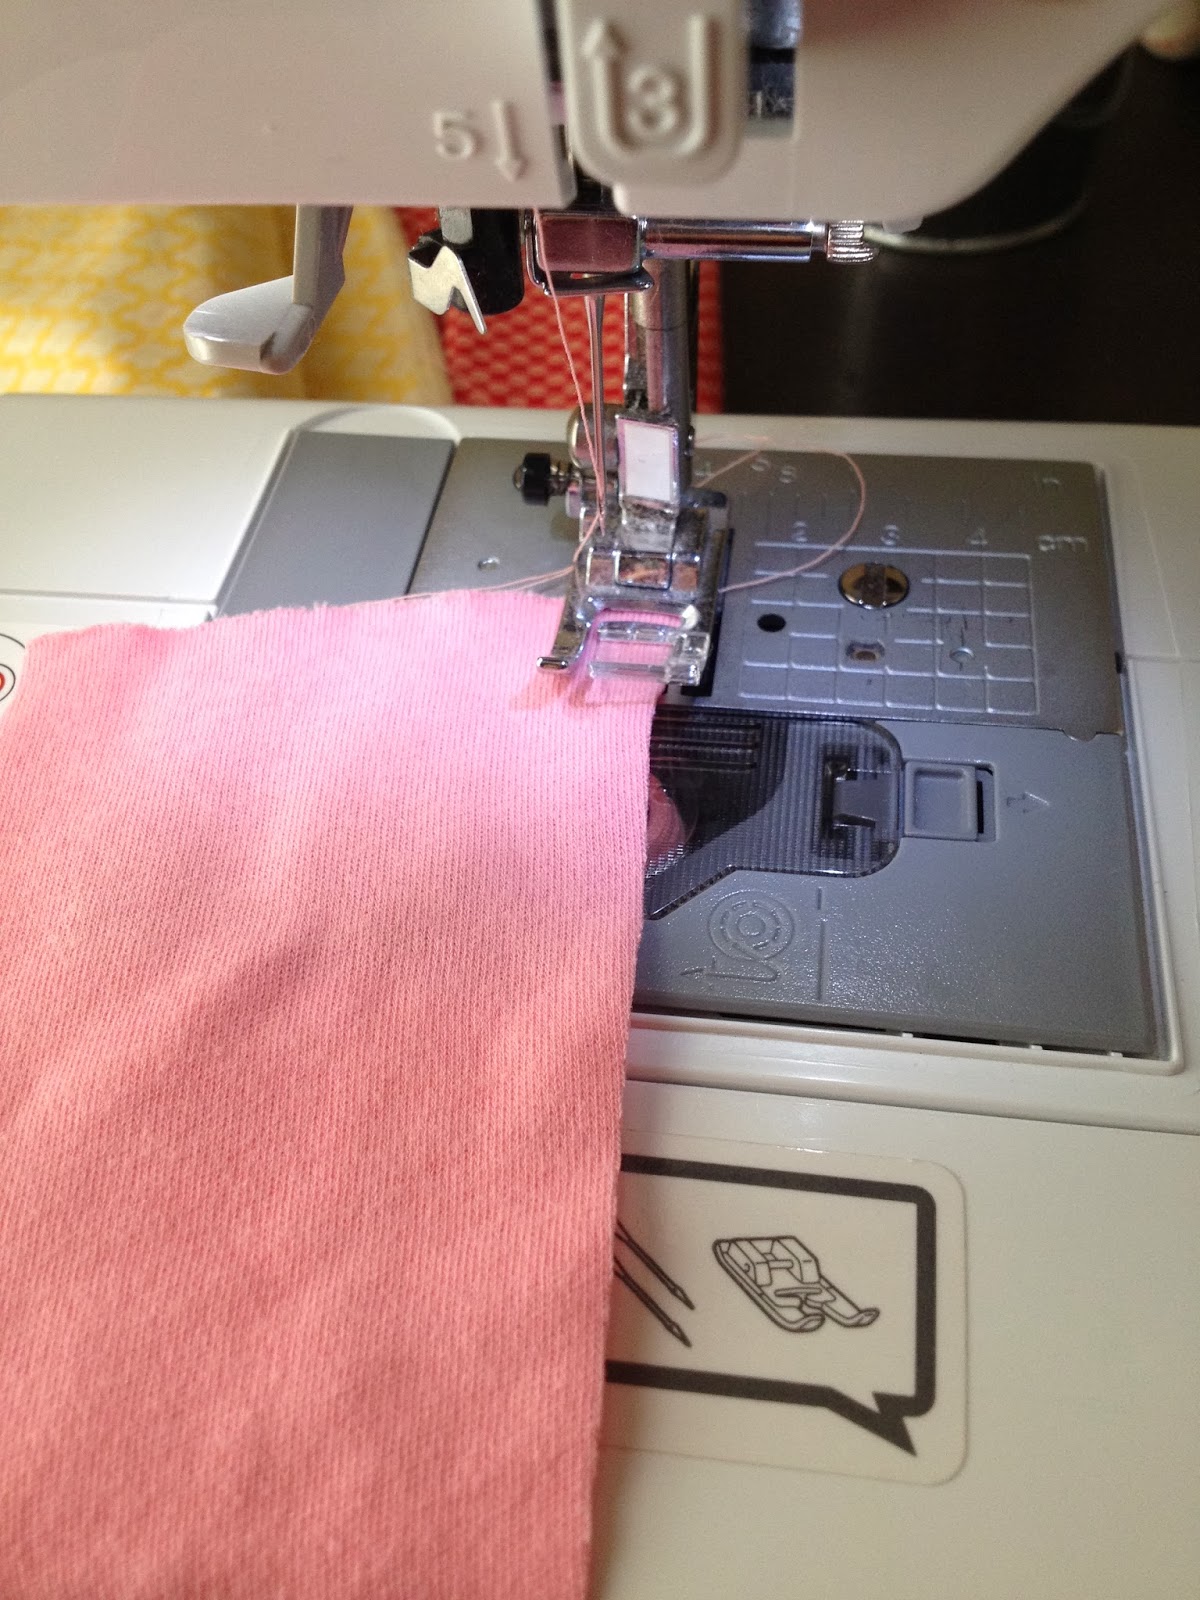
Make your ruffles! Take your strips to your machine and adjust your settings. Turn your tension dial to the highest, or almost highest as I did, setting and adjust the width between stitches to as wide as possible. In this picture you can see my tension dial at the top left of my machine and the screen shows the adjustment to the stitch width.
This is where I set my presser foot when I stitched these. You can do it as close to the edge as you like. Just be consistent with each one. Do not back stitch when you start or finish and leave extra thread on each end. Return your settings back to their normal settings before you get up and go back to your pants. Otherwise, you will forget and will make ruffles out of your the pant legs, which you don't want to do.
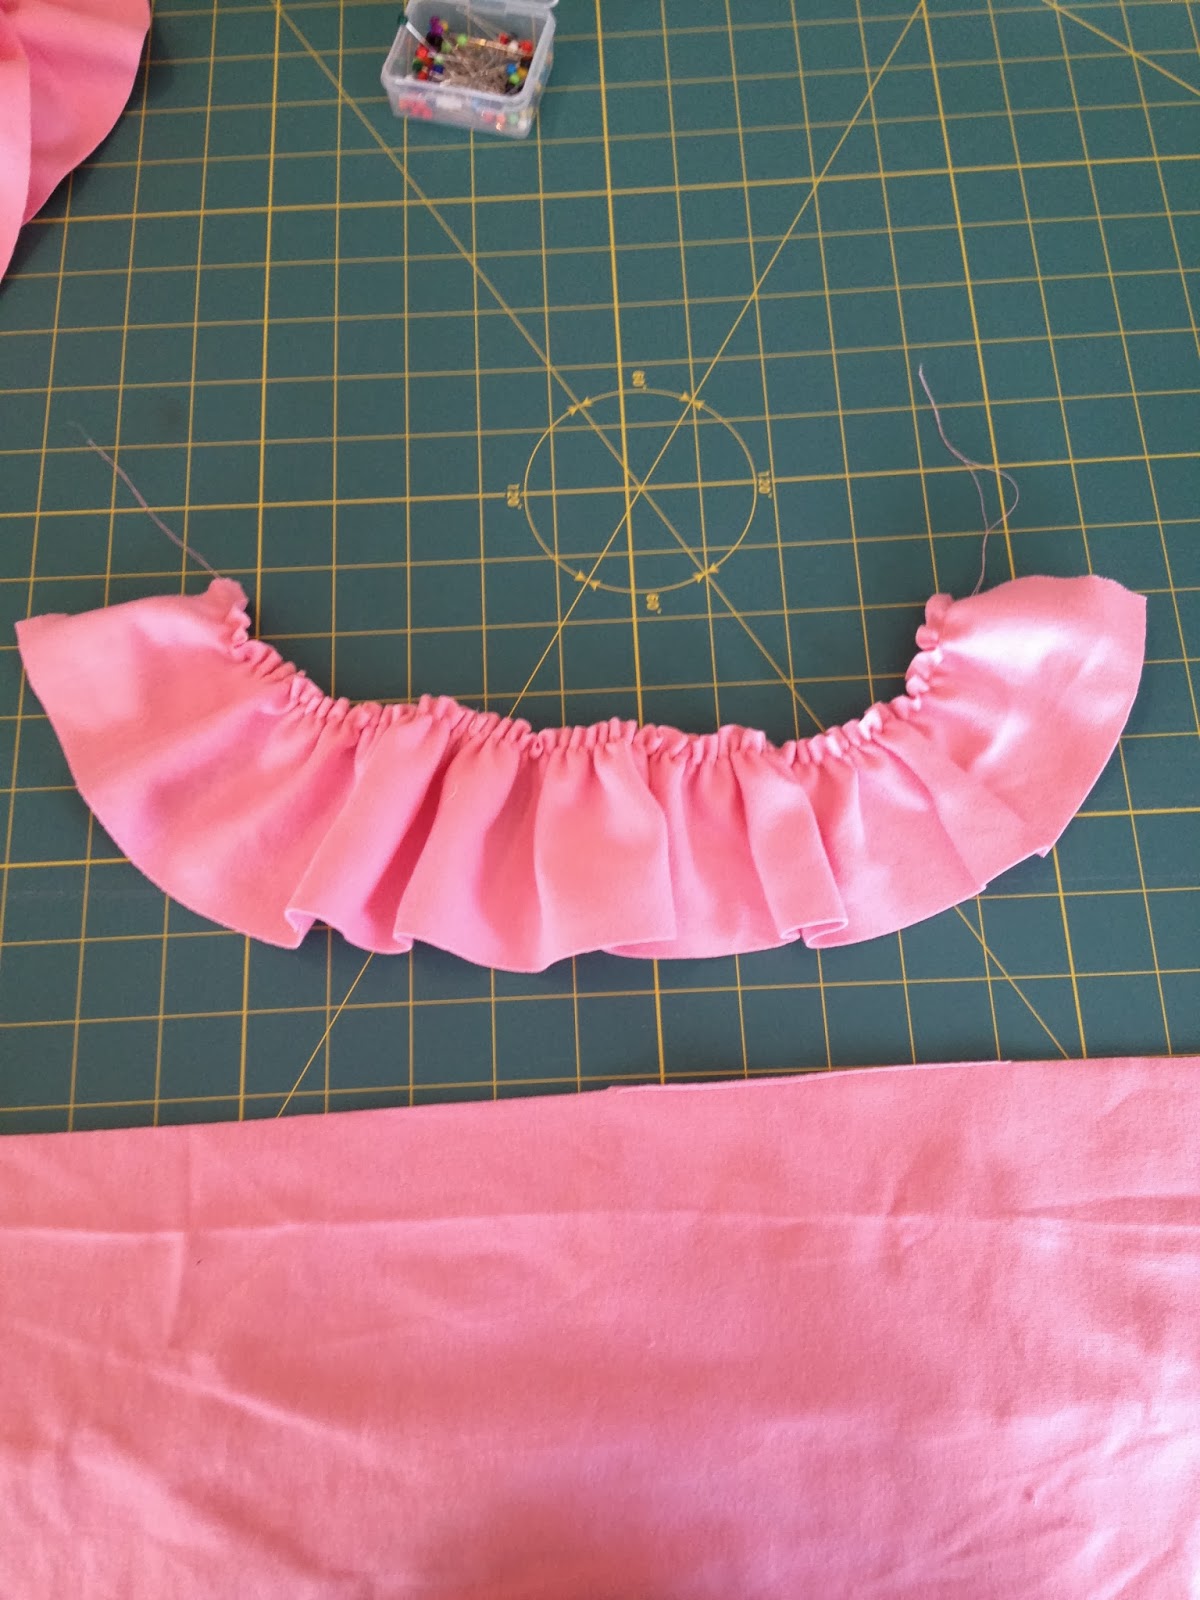
When you are finished you will have a ruffle. Note the thread ends I have on each end of my ruffle. You need this extra space to stretch out your ruffle as needed to fit across your pant leg. Gently slide the fabric along the thread to adjust it to fit, to not pull too hard or you will snap the thread.
Step 6
Once you have sewn all your ruffles, turn your pants right side out, lay out your pants leg nice and flat, grab your pins and pin your ruffle to the leg.
Now you are getting really excited aren't you?
I would say I started pinning about a half inch above the bottom of the pant leg.
Step 7
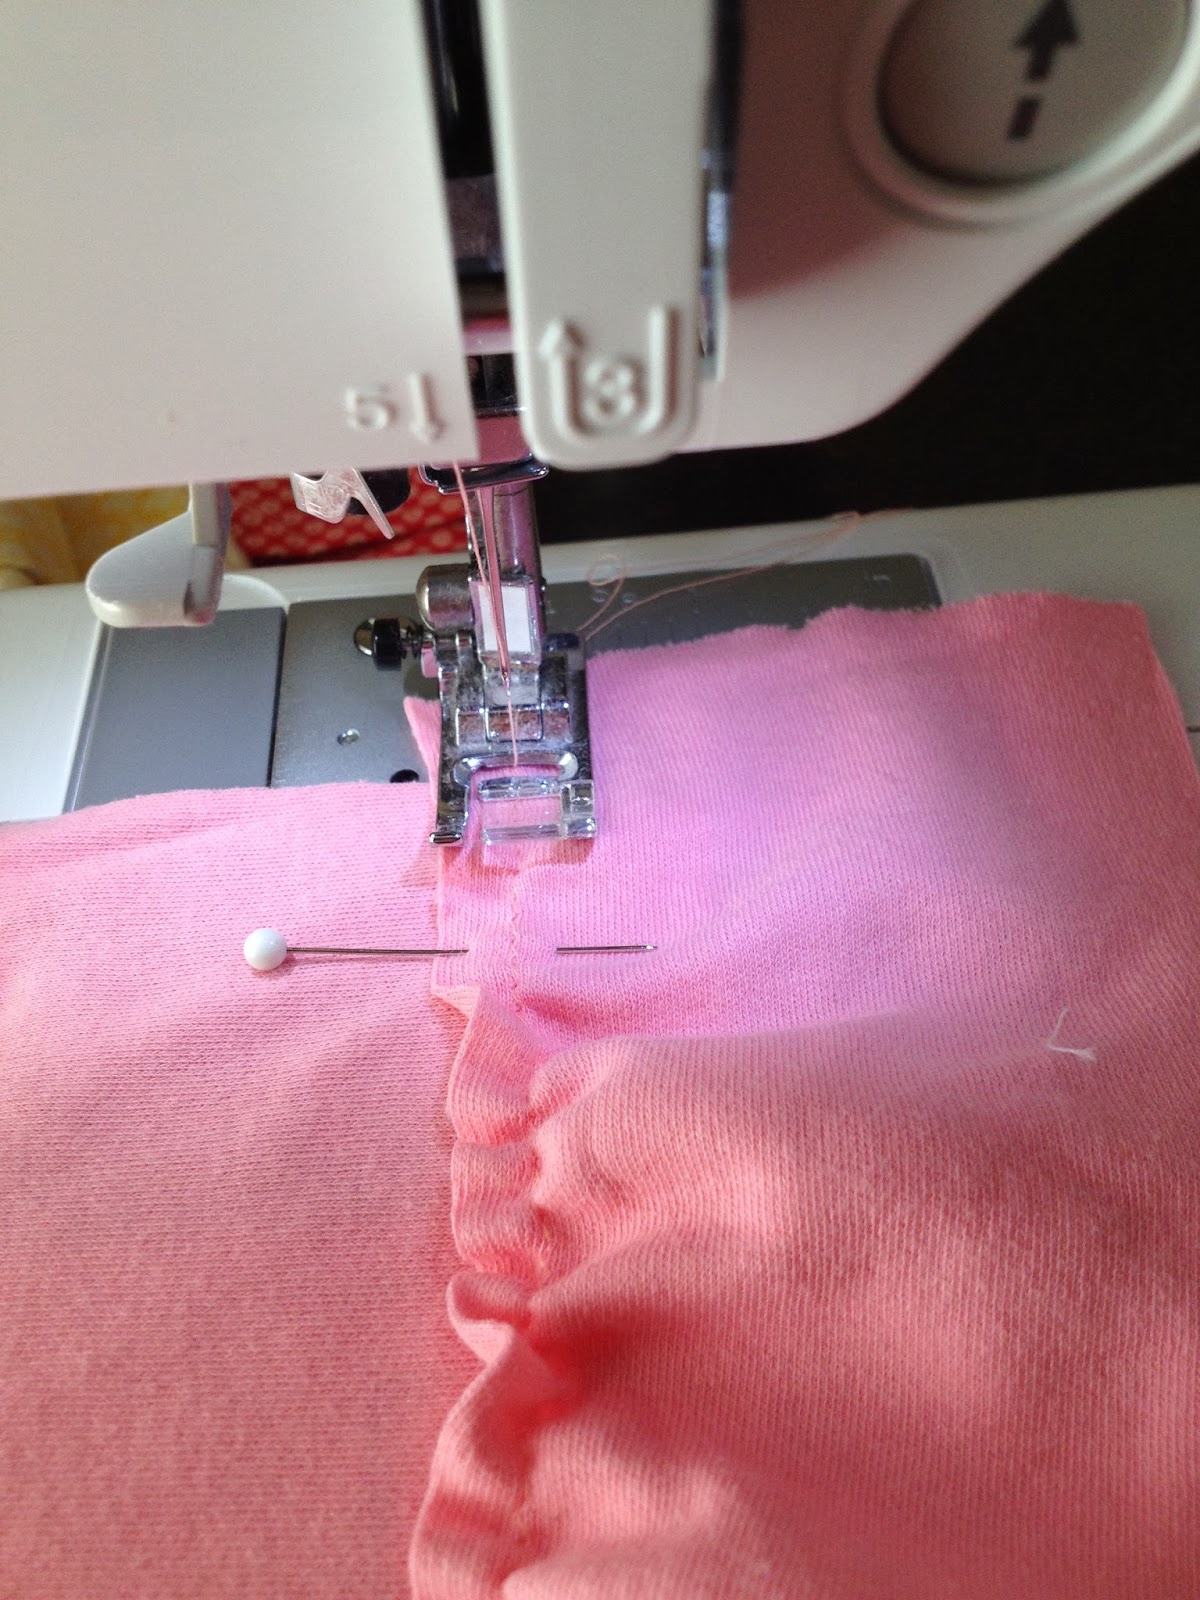
Sew those ruffles! I try to line up my new stitch to go over the stitch we did to make the ruffle.
Layer one done. You could stop here if you want, or go on to more layers.
Step 8
Pin on your second layer and sew. Repeat for a third layer.
Step 9
Once you are done with the ruffles, turn the pants inside out and lay them flat and pin the inside edges.
Once you are done stitching around the inside of your pants, you can trim off the excess ruffle.
You are almost done!
Step 10
Make your waist band.
Get your person who will be wearing the pants, get your elastic (I think mine was 1/4 in. wide, you could use any width you want, although don't go any smaller than 1/4 in.) and measure.
Fold down the top of the pants. You could pin, I did not. You could measure it out, I did not. It's really not going to matter, it will not show anyways.
Then stitch around the top of the pants allowing plenty of space for the elastic to run through. Do not sew all the way around, stop and leave a gap where you will insert the elastic and work it around the casing you just made.
To insert the elastic, put a safety pin on one end and work it through. Once you come full circle, overlap the ends of the elastic and stitch back and forth several times, make sure it's all tucked in and close up your gap by stitching that small opening shut.
And you are DONE!
Ruffle pants in ten steps. Super easy, not too time consuming and best of all, no hemming!
My lovely love and her sister in heels. Oh, and the pants.
Note: This is my first tutorial. I do not know if I will ever do it again. I have a new appreciation for people who do this regularly as it is complicated to do. So, if you find an error, or if this is way hard to understand, or if I skipped a step somewhere, please forgive me and let me know so that I can make a correction. If you made something beautiful with this tutorial, let me know!


No comments:
Post a Comment